English | MP4 | AVC 1280×720 | AAC 44KHz 2ch | 278 lectures (28h 32m) | 10.23 GB
(MCU1) Learn bare metal driver development using Embedded C: Writing drivers for STM32 GPIO,I2C,SPI,USART from scratch
Learning Embedded System Programming can be a challenge. Since it’s a relatively complex field, there’s no actual gold standard yet for how things are practiced, or taught, which can frustrate people who are just trying to learn new things and couldn’t connect the dots.
This is the motivation behind creating this course to help engineers and students learn different aspects of embedded systems by providing high-quality advanced lectures at a relatively low price.
Master Behind the Scene working;
created this course because I believe your time is precious, and you shouldn’t have to hunt around to get a practical foundation In Embedded System Programming. In this course, you will learn to write your peripheral driver for most commonly used peripherals such as GPIOs, I2C, SPI, USART, etc., and the exciting thing is that you will learn everything from scratch.
No 3rd party libraries!
No blind coding!
Write your driver APIs by dealing with the peripheral registers of the MCU!
Code and Implement APIs from scratch, diving into the datasheet and reference manual of the MCU. I will thoroughly explain how to extract the maximum information from datasheets, Technical Reference manuals to configure and handle peripherals. These techniques you can go and apply to any MCUs you have at your hand.
In this course, I will walk you through step-by-step procedures on configuring various Peripherals like GPIOs, SPI, USART, I2C by taking you into the reference manual and datasheet. We will develop a fully working driver code, interrupt handlers, sample application everything from scratch to understand the big picture.
In each lecture, I assure you that you will learn something new to use in your work or projects. You’ll find yourself handling these peripherals with much more clarity. You will be able to speculate and debug the problem quickly. I’ll show you tricks and tips to debug the most common issues using debugging tools such as logic analyzers.
This is not the Arduino style of programming:
I believe Arduino is for quick prototyping of projects/products but not for mastering the working of micro-controllers and their peripherals. Unlike Arduino programming, where you develop a quick solution and prototyping of products using third-party libraries, this course is entirely different. In this course, no 3rd party libraries are used. Everything we will code by referring to the technical reference manual of the MCU and will create our own library. The Power of this approach is that you can quickly speculate problems and debug like a pro when things go wrong in your project due to bugs. If one thing me and my students are good at is “debugging,.” To achieve good debugging skills, it’s essential to code by understanding how things work behind the scene but not by blindly using some third-party libraries, and that’s the biggest TAKE away from this course.
The course is designed and explained so that it is generic across any microcontroller. The code we develop can be used as templates to quickly build a peripheral driver for your MCUs on-chip peripherals.
Software/Hardware used:
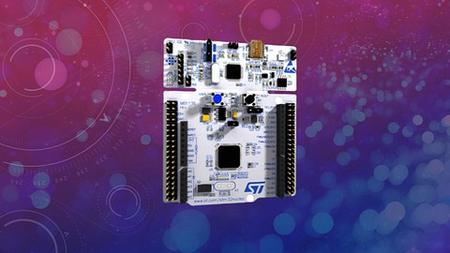
In this course, the code is developed so that it can be ported to any MCU you have at your hand. If you need any help porting these codes to different MCUs, you can always reach out to me! The course is strictly not bound to any 1 type of MCU. So, if you already have any Development board that runs with an ARM-Cortex M3/M4 processor, I recommend you continue using it. But if you don’t have any development boards, then check out the below Development boards.
What you’ll learn
- Understand Right ways of Handling and programming MCU Peripherals
- Develop Peripheral drivers for your Microcontroller
- Understand complete Driver Development steps right from scratch for GPIO,SPI,I2C and USART.
- Learn Writing peripheral driver headers, prototyping APIs and implementation
- Explore MCU data sheets, Reference manuals, start-up Codes to get things done
- Learn Right ways of handling/configuring Interrupts for various peripherals
- Learn about Peripheral IRQs/Vector table/NVIC interfaces and many
- Learn about Configuration/status/Control registers of various Peripherals
- Demystifying behind the scene working details of SPI,I2C,GPIOs,USART etc.
- Explore hidden secretes of MCU bus interfaces, clock sources, MCU clock configurations, etc.
- Understand right ways of enabling/configuring peripheral clocks/serial clocks/baud rates of various serial protocols
- Learn about MCUs AHB, APB bus protocols
- Learn about different MCU clocks like HCLK, PCLK, PLL,etc
- Learn to capture/decode/analyze traces of serial protocols on Logic analyzer
- Learn about Quick ways of debugging peripheral issues with case studies
Table of Contents
Notes and Information
1 About the instructor
2 Important Note
3 What is this course all about
4 Source Code and Slides
5 Rating and Review
Development board used in our courses
6 About MCU Development board
HardwareSoftware Requirements
7 HardwareSoftware Requirements
IDE installation
8 Downloading STM32CUBEIDE
9 Installation-Windows
10 Installation-Ubuntu
11 Embedded Target
12 Documents required
Creating a project using STM32CUBEIDE
13 Creating Hello-World project
14 SWV working principle
15 Testing Hello-World through SWV
16 OpenOCD and Semihosting to use printf
Embedded Code Debugging Tips and tricks
17 Debugging options
18 Single stepping
19 Disassembly and Register windows
20 Breakpoints
21 Expression and variable windows
22 Memory browser windows
23 Call stack and fault analyzers
24 Data watch-points
25 SFR windows
26 Other basic features of IDE
Understanding MCU Memory Map
27 Understanding Memory Map of the MCU Part 1
28 Understanding Memory Map of the MCU Part 2
29 Understanding Memory Map of the MCU Part 3
MCU Bus Interfaces
30 MCU Bus Interfaces Explanation Part 1 I-CodeD-CodeS-Bus
31 MCU Bus Interfaces Explanation Part 2 AHBAPB1APB2
32 MCU Bus Interfaces Explanation Part 3 QA session
33 Understanding MCU Bus Matrix
Understanding MCU Clocks and Details
34 Understanding MCU Clocking SystemPart1
Understanding MCU Clock tree
35 Understanding MCU clock sources and HSE
36 HSI and RCC registers
37 Peripheral clock configuration
38 Exercise HSI measurements
39 About USB logic analyzer
40 Code implementation
41 Exercise HSE measurements
Understanding MCU Vector table
42 Understanding MCU Vector Table
Understanding MCU interrupt Design , NVIC, Interrupt handling
43 Understanding MCU interrupt Design , NVIC, Interrupt handling Part 1
44 Understanding MCU interrupt Design , NVIC, Interrupt handling Part 2
45 Understanding MCU interrupt Design , NVIC, Interrupt handling Part 3
Importance of Volatile Keyword
46 Importance of Volatile Keyword Part-1
47 Importance of Volatile Keyword-Part 2
GPIO Must know concepts
48 GPIO pin and GPIO port
49 GPIO behind the scene
50 GPIO input mode with high impedance state
51 GPIO input mode with pull-updown state
52 GPIO output mode with open drain state
53 GPIO output mode with push pull state
54 Optimizing IO power consumption
GPIO Programming structure and Registers
55 GPIO programming structure
56 Exploring GPIO PORT and pins of STM32F4xx Discovery board
57 GPIO Mode register(used to set mode for a pin)
58 Input configuration of a Microcontroller’s GPIO Pin
59 Output Configuration of a GPIO Pin in Push pull mode
60 Output Configuration of a GPIO Pin in open drain mode
61 Input stage of a GPIO pin during output configuration
62 Alternate functionality Configuration of a GPIO pin
63 GPIO out put type register explanation
GPIO Registers SPEED, PULL UPDOWN, IDR and ODR
64 GPIO output speed register and its applicability
65 GPIO Pull up and Pull down register
66 GPIO input data register
67 GPIO output data register and summary of various modes discussed
GPIO Alternate functionality register and example of usage
68 Alternate functionality settings of a GPIO pin with example Part 1
69 Alternate functionality settings of a GPIO pin with example Part 1
70 Request for Review
GPIO peripheral clock control
71 Enabling and disabling GPIO peripheral clock
GPIO driver development overview and Project creation
72 GPIO driver development overview
73 MCU Specific header file and its contents
74 New project creation and creating MCU specific headerfile
75 Include path settings
76 Important note on IDE usage
Updating MCU specific header file with bus domain and peripheral details
77 Writing base address C macros for MCU’s embedded memories Part 1
78 Writing base address C macros for MCU’s embedded memories Part 2
79 Defining base addresses of different bus domains
80 Defining base addresses of AHB1 Peripherals
81 Defining base addresses of APB1 and APB2 Peripherals
82 Defining base addresses conclusion
Structuring peripheral registers
83 Address of peripheral registers
84 Structuring peripheral registers
85 Peripheral definition macros
Writing Clock enable and disable macros
86 Writing peripheral clock enable and disable C Macros
87 Project include settings and build
GPIO driver API requirements and handle structure
88 Creating GPIO driver header and source file
89 Defining GPIO handle and configuration structure
90 Driver API requirements and adding API prototypes
91 Driver API input parameters and return types
92 Driver empty API implementation and documentation
GPIO driver API Implementation Clock control
93 Implementation of GPIO peripheral clock control API
GPIO driver API Implementation GPIO init and de-init
94 Writing user configurable macros
95 Implementation of GPIO init API
96 Implementation of GPIO init API contd
97 Configuring Alternate function registers
98 GPIO de-init API implementation
GPIO driver API Implementation GPIO data read and write
99 Implementation of GPIO input port read and input pin read APIs
100 Implementation of GPIO output port write and output pin write APIs
101 Implementation of GPIO pin toggle API
Exercise
102 Exercise LED toggling with PUSH PULL configuration
103 Exercise LED toggling with OPEN DRAIN configuration
104 Exercise Handling on board LED and Button
105 Exercise Connecting external button and circuit explanation
106 Exercise Testing button interface
107 Exercise Button interrupt introduction
GPIO pin Interrupt configuration
108 GPIO pin Interrupt configuration coding Part 1
109 GPIO pin Interrupt configuration coding Part 2
110 GPIO pin Interrupt configuration coding Part 3
111 GPIO pin Interrupt configuration coding Part 4
112 GPIO pin Interrupt configuration coding Part 5
113 GPIO pin Interrupt configuration coding Part 6
114 GPIO pin Interrupt configuration coding Part 7
Exercise GPIO interrupts
115 Exercise External button interrupt implementation
116 Exercise Debugging the application Part 1
117 Exercise Debugging the application Part 2
MCU IO Pin specifications
118 STM32 Pin specifications
119 Pin current characteristics
120 Logic levels
SPI introduction and bus details
121 Introduction to SPI Bus
122 SPI comparison with other protocols
123 Importance of SPI slave select pin
124 SPI Minimum bus configuration
125 SPI behind the scene data communication principle
SPI bus configuration and functional block diagram
126 SPI bus configuration discussion full duplex, half duplex and simplex
127 SPI functional block diagram explanation
STM32 NSS pin settings and management
128 NSS settings in STM32 master and slave modes
129 STM32 SPI hardware and software slave managements
SPI CPOL and CPHA discussion
130 SPI CPOL and CPHA discussion
131 SPI CPOL and CPHA waveform example
SPI serial clock discussion
132 SPI peripherals of your Microcontroller
133 SPI Serial clock frequency
SPI Driver API requirements and configuration structure
134 SPI API requirements and configuration items
135 updating MCU specific header file with SPI related details
136 SPI adding API prototypes to driver header file
SPI Driver API Implementation Clock control
137 Implementation of SPI peripheral clock control API
SPI Driver API Implementation SPI init
138 SPI user configuration options writing and register bit definition macros
139 Implementation of SPI init API Part 1
140 Implementation of SPI init API Part 2
SPI Driver API Implementation Send Data
141 Implementation of SPI send data API Part 1
142 Implementation of SPI send data API Part 2
143 Implementation of SPI send data API Part 3
144 Implementation of SPI send data API Part 4
Exercise SPI Send Data
145 Exercise to test SPI Send Data API
146 Finding out microcontroller pins to communicate over SPI2
147 Exercise Code implementation Part 1
148 Exercise Code implementation Part 2
149 Exercise Code implementation Part 3
150 Exercise Testing
Exercise STM32 master and Arduino Slave communication
151 Exercise Communicating with Arduino slave
152 Exercise Coding Part 1
153 Exercise Coding Part 2
154 Exercise Coding Part 3
155 Exercise Testing
SPI Driver API Receive data
156 Implementation of SPI data receive API Part 1
157 Implementation of SPI data receive API Part 2
Exercise SPI receive data
158 Exercise SPI command and response based communication
159 Exercise Coding Part 1
160 Exercise Coding Part 2
161 Exercise Coding Part 3
SPI interrupts
162 SPI peripheral interrupting the processor
SPI interrupt mode APIs
163 SPI interrupt mode API implementation and changes to handle structure
164 SPI send data with interrupt API implementation
165 SPI receive data with interrupt implementation
SPI Driver API IRQ handling
166 SPI Handling of interrupts
167 SPI IRQ handler implementation Part 1
168 SPI IRQ handler implementation Part 2
169 SPI IRQ handler implementation Part 3
170 Exercise
Common problems in SPI
171 Common problems in SPI and Debugging Tips
I2C introduction and I2C signals
172 I2C introduction and differences with SPI
173 I2C SDA and SCL signals
I2C modes
174 I2C standard and fast mode
Understanding I2C Protocol
175 I2C Protocol explanation
176 I2C START and STOP conditions
177 I2C ACK and NACK
178 I2C Data validity
I2C master and slave communication
179 Example of master writing to slave
180 Understanding repeated START condition
STM32 I2C functional block diagram
181 I2C functional block diagram
I2C driver API requirements and config structures
182 I2C driver API requirements
183 I2C handle and configuration structure
184 I2C user configurable macros
185 I2C API prototypes
186 Steps for I2C init implementation
I2C serial clock discussion(SCLK)
187 I2C serial clock settings with explanation
188 Clock Stretching
I2C Driver API I2C Init
189 Implementation of I2C init API Part 1
190 Implementation of I2C init API Part 2
191 Implementation of I2C init API Part 3
I2C Driver API I2C Master send data
192 I2C transfer sequence diagram for master sending data
193 Implementation of I2C master sending data API Part 1
194 Implementation of I2C master sending data API Part 2
195 Implementation of I2C master sending data API Part 3
196 Implementation of I2C master sending data API Part 4
197 Implementation of I2C master sending data API Part 5
I2C pull up resistance , rise time and bus capacitance
198 I2C pull up resistance , rise time and bus capacitance discussion
199 I2C rise time calculation
Exercise
200 Exercise Introduction
201 Exercise Coding Part 1
202 Exercise Coding Part 2
203 Exercise Testing
I2C Driver API I2C Master receive data
204 I2C transfer sequence diagram for master receiving data
205 Assignment I2C master receive data API implementation
206 Implementation of I2C master receive data API Part 1
207 Implementation of I2C master receive data API Part 2
Exercise
208 Exercise Reading data from the I2C slave
209 Exercise Coding Part 1
210 Exercise Coding Part 2
211 Exercise Coding Part 3
212 Exercise Testing repeated start
I2C Interrupts and IRQ numbers
213 I2C IRQ and interrupt discussion
214 I2C errors and importance of BUSY flag
215 I2C handle structure modification
216 I2C adding interrupt related macros and interrupt APIs
I2C interrupt based APIs
217 Assignment I2C interrupt APIs implementation
218 Implementation of I2C interrupt based APIs
I2C IRQ handler implementation
219 I2C IRQ handler implementation Part 1
220 I2C IRQ handler implementation Part 2
221 I2C IRQ handler implementation Part 3
222 I2C IRQ handler implementation Part 4
223 I2C IRQ handler implementation Part 5
224 I2C IRQ handler implementation Part 6
225 I2C IRQ handler implementation Part 7
226 I2C IRQ handler implementation Part 8
227 I2C error IRQ handler implementation
Exercise
228 Exercise Testing I2C interrupt APIs part 1
229 Exercise Testing I2C interrupt APIs part 2
I2C slave programming
230 I2C slave programming discussion
231 I2C transfer sequence diagram for slave transmitter
232 I2C slave support in driver
Exercise
233 Exercise I2C slave programming
234 Exercise Coding Part 1
235 Exercise Testing
236 Exercise Modifying I2C transactions
Common problems in I2C
237 Common Problems in I2C and Debugging Tips
UART Essentials
238 Intro UART vs USART
239 Understanding UART pins
240 UART frame formats
241 Baud Rate
242 Synchronization bits
243 UART Parity
UART functional block and Peripheral Clock
244 Exploring UART functional block
245 UART peripheral clock
UART Communication
246 UART Transmitter
247 Uart Receiver
USART driver development
248 USART driver development confiugrable items
249 USART driver APIs prototypes
250 Configuration options and USART registers
251 USART Driver API USART Init
252 USART Driver API Tx and Rx assignment
253 USART Driver API Send data
USART oversampling and baudrate
254 USART oversampling
255 USART Baud rate calculation Part-2
256 USART Baud rate calculation Part-2
257 USART baudrate coding
Exercise
258 Exercise USART send data to arduino
259 communicating with PC over UART
USART interrupts
260 USART interrupt discussion
261 Exercise
262 USART IRQ handler implementation Assignment
Exercise RTC on LCD
263 Real time clock on LCD
264 DS1307 RTC registers
265 RTC code implementation
266 RTC coding for set time and date
267 RTC coding for get time and date
268 BCD and Binary manipulation functions
269 Writing RTC application
270 RTC and Systick
271 LCD connections
272 Significance of LCD pins
273 LCD initialization
274 LCD initialization flowchart
275 Sending command and data to LCD
276 Creating LCD command code
277 Testing
BONUS LECTURE
278 BONUS LECTURE
Resolve the captcha to access the links!